Oktober 11th, 2021

This registry hack lets you restore the old right-click context menus in Windows 11

Windows 11 context menu

Microsoft has made many changes in the move from Windows 10 to Windows 11, and not all of them have proved popular. One of the more controversial changes — at least aesthetically speaking — is the new-look context menu.

The menu that appears when you right-click on files, folders and the desktop has been given a revamp in Windows 11 and not everyone is happy with it. If you prefer things the way they used to be, there’s a registry hack you can use to tame the context menu.

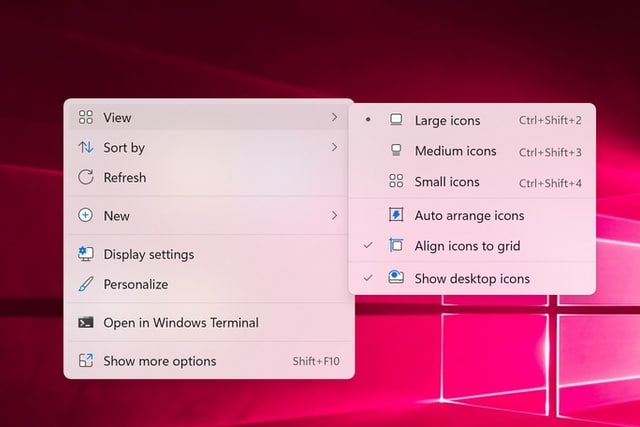
While some people love the new look, others are less than keen on the fact that the menu is now bigger than before without giving access to any new options. Depending on what you right-click on, some options have been reduced to unlabelled icons, and this has caused a good deal of confusion.

If you are one of those who prefers the way the context menu looked in Windows 10, use the following registry tweak to change the style.

  1. Press the Windows key and R to activate the Run dialog
  2. Type regedit and press Enter to launch the Registry Editor
  3. Navigate to HKEY_CURRENT_USER \ Software \ Classes \ CLSID
  4. Click Edit > New > Key and create a new key called {86ca1aa0-34aa-4e8b-a509-50c905bae2a2}
  5. With the new key selected, click Edit > New > Key and create a new key called InprocServer32
  6. Select the newly created key and then double click the Default entry in the right-hand pane
  7. Do not type anything, but press Enter (you should notice that the data column changes from (value not set) to simply being blank
  8. Either restart your computer, or just restart the explorer.exe process

When you right-click, you should now see a context menu that looks more like it did in Windows 10.

by admin | Posted in EDV Ecke, Windows | Kommentare deaktiviert für This registry hack lets you restore the old right-click context menus in Windows 11 |
Oktober 8th, 2021

How to Disable VBS and Speed Up Windows 11

Virtualization-based security, aka VBS, allows Windows 11 to create a secure memory enclave that’s isolated from unsafe code. Another built-in feature called Hypervisor-Enforced Code Integrity (HVCI) uses the capabilities of VBS to prevent unsigned or questionable drivers and software from getting into memory. Together VBS and HVCI add a layer of protection that limits how much damage malware can do, even if it gets past your antivirus software. 


Unfortunately, VBS and HVCI have a significant performance cost, particularly when it comes to gaming. In our tests, we found that games ran as much as 5 percent slower with these settings on as with them off. Others have seen even bigger deltas; our colleagues at PC Gamer saw drops of 25 percent, though they tested with a 10th Gen Intel CPU when Microsoft recommends no less than an 11th processor.


Simply upgrading to Windows 11 will not turn on VBS, unless you already had it enabled in Windows 10, where it has been a non-default option for several years. So, at the moment, this is a problem few people will actually have.


However, if you do a clean install of Windows 11 or buy a brand new laptop or desktop with Windows 11, you may have VBS / HVCI enabled by default. Microsoft recommends that OEMS have it enabled by default but notes that „some devices that are especially sensitive to performance (e.g. gaming PCs) may choose to ship with HVCI disabled.“ And we know of at least one OEM, MSI, who told us that they would ship their systems with VBS disabled.


If you’re using Windows 11 and performance, particularly gaming performance, matters most to you, we’ll show you how to check to see if VBS / HVCI is enabled and how to turn it off. However, if you’re not gaming, you may want to leave the security in place.

How to Check if VBS is Enabled in Windows 11


Before you start thinking about turning off VBS, you need to find out if it’s on in the first place. 


1. Open system information. The easiest way to do that is by searching for „system information“ in Windows search and clicking the top result.


open system information

(Image credit: Future)
 

2. Scroll down to find the „Virtualization-based security“ row. If it says „running,“ VBS is enabled. But if it says „not enabled,“ then you’re done.


System information

(Image credit: Future)

How to Disable VBS / HVCI in Windows 11


1. Search for Core Isolation in Windows search and click the top result.


search for core isolation

(Image credit: Future)
Advertisement

2. Click Windows Security and Ok if asked what app to use. A submenu opens.


click Windows Security

(Image credit: Future)
 

3. Toggle Memory Integrity to off, if it was on. If it is not on, skip ahead to step 6.


toggle memory integrity to off

(Image credit: Future)
 

4. Reboot your PC as prompted..


reboot

(Image credit: Future)
Advertisement

5. Check system info again to see if virtualization-based security is listed as „not enabled.“ If so, you are done. If not, go to step 6 where you’ll disable VBS in the registry.


check system info again

(Image credit: Future)
 

6. Open regedit. The easiest way is by hitting Windows + R, entering regedit in the text box and click Ok.


open regedit

(Image credit: Future)
 

7. Navigate to HKEY_LOCAL_MACHINE\System\CurrentControlSet\Control\DeviceGuard.


navigate to the registry key

(Image credit: Future)
Advertisement

8. Open EnableVirtualizationBasedSecurity and set it to 0.


Open EnableVirtualizationBasedSecurity and set it to 0

(Image credit: Future)
 

9. Close regedit and reboot your PC.


At this point, you should see that VBS is disabled in the system info app.

by admin | Posted in EDV Ecke, Windows | Kommentare deaktiviert für How to Disable VBS and Speed Up Windows 11 |


Powered by Wordpress using the theme bbv1